Nodejs实战 —— Node Web 程序是什么

读 《node.js实战2.0》,进行学习记录总结。

当当网购买链接

豆瓣网1.0链接

Node Web 程序是什么

了解 Node Web 程序的结构

典型的Node Web 程序是由下面几部分组成的:

  • package.json : 一个包含依赖项列表和运行这个程序的命令的文件;
  • public:静态资源文件
  • node_modules:项目的依赖项
  • 程序代码:
    • app.js 或 index.js :设置程序的代码
    • models:数据库模型
    • views:渲染页面的模板
    • controllers或 routes :HTTP 请求处理器
    • middleware: 中间件组件

开始一个新的 Web 程序

创建一个新目录,然后运行:

1
2
3
mkdir later
cd later
npm init -fy

安装 express

1
npm i express -S

可以在 package.json,看到express 已经被安装上去了

1
2
3
"dependencies": {
"express": "^4.16.4"
}

如果要卸载可以使用下面的命令:

1
npm rm express -S

创建一个简单的服务器

1
2
3
4
5
6
7
8
9
10
11
12
13
14
// index.js
const express = require('express');
// express() 创建一个程序实例
const app = express();

const port = process.env.PORT || 3000;
// 添加路由处理器
app.get('/',(req,res) =>{
res.send('Hello World');
});
// 程序实例绑定到一个 TCP端口
app.listen(port,()=>{
console.log(`Express web app available at localhost: ${port}`);
});

新增 package.json 文件的 npm 脚本

1
2
3
4
"scripts": {
"start": "node index.js",
"test": "echo \"Error: no test specified\" && exit 1"
},

运行程序:

1
npm start

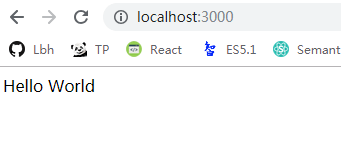
可以看到:

开始一个web程序

跟其他平台比较

如果在 PHP 实现上面的程序,代码如下:

1
<?php echo '<p>Hello World</p>'; ?>

只有一行,并且一看就明白,那么这个更加复杂的 Node示例有什么优点呢?二者是编程范
式上的区别:用 PHP,程序是页面;Node:程序是服务器,这个Node 示例可以完全控制请求和响应,不用配置服务器就可以做所有事情,如果要用 HTTP 压缩或 URL 转发,可以将这些功能作为程序的逻辑来实现。不需要把 HTTP 程序和逻辑分开,它们是程序的一部分。

搭建一个 RESTful Web 服务

RESTful 服务可以方便创建和保存文件,将杂乱的 Web 页面变得整洁。

设计 RESTful 服务要想好操作,映射到 Express 路由上面。此例子,需要保存文章、获取文章、获取包含所有文章的列表和删除不再需要的文章这几个功能。分别对应下面的路由:

  • POST /articles:创建新文章
  • GET /articles/:id :获取指定文章
  • GET /articles:获取所有文章
  • DELETE /articles/:id :删除指定文章

简单的 Express 程序实现了这些路由,现在使用 JavaScript 来存储文章

1
2
3
4
5
6
7
8
9
10
11
12
13
14
15
16
17
18
19
20
21
22
23
24
25
26
27
28
29
30
31
32
33
34
35
36
37
// index.js
const express = require('express');
// express() 创建一个程序实例
const app = express();

// 数组定义 文章articles
const articles = [{ title: 'Example' }];
const port = process.env.PORT || 3000;
// 添加路由处理器
app.get('/', (req, res) => {
res.send('Hello World');
});
// 获取所有文章
app.get('/articles', (req, res, next) => {
res.send(articles);
});
// 创建一篇文章
app.post('/articles', (req, res, next) => {
res.send('OK');
});
// 获取指定文章
app.get('/articles/:id', (req, res, next) => {
const id = req.params.id;
console.log('Fetching:', id);
res.send(articles[id]);
});
// 删除指定文章
app.delete('/articles/:id', (req, res, next) => {
const id = req.params.id;
console.log('Deleting:', id);
delete articles[id];
res.send({ message: 'Deleted' });
});
// 程序实例绑定到一个 TCP端口
app.listen(port, () => {
console.log(`Express web app available at localhost: ${port}`);
});

Express 能自动将数组转换成 JSON 响应。

创建文章,处理 POST 请求需要消息体解析。安装解析器

1
npm i -S body-parser

添加消息解析器:

1
2
3
4
5
6
7
8
9
10
11
12
13
// 消息解析器
const bodyParser = require('body-parser');
app.use(bodyParser);
// 支持编码为 JSON 的消息请求体
app.use(bodyParser.json());
// 支持编码为表单的请求消息体
app.use(bodyParser.urlencoded({ extended: true }));
// 创建一篇文章
app.post('/articles', (req, res, next) => {
const article = { title: req.body.title };
articles.push(article);
res.send(article);
});

添加数据库

就往 Node程序中添加数据库而言,并没有一定之规,但一般会涉及下面几个步骤。

(1) 决定想要用的数据库系统。
(2) 在 npm上看看那些实现了数据库驱动或对象-关系映射(ORM)的热门模块。
(3) 用 npm –save 将模块添加到项目中。
(4) 创建模型,封装数据库访问 API。
(5) 把这些模型添加到 Express路由中。

创建数据库之前,添加路由处理代码,程序汇中的 HTTP 路由处理会向模型发起一个简单的调用

1
2
3
4
5
6
app.get('/articles', (req, res, next) => {
Article.all((err, articles) => {
if (err) return err;
res.send(articles);
});
});

这个 HTTP 路由是用来获取所有文章的,所以对应的模型方法应该类似于 Article.all 。这要取决于数据库 API,一般来说应该是 Article.find({}, cb) 和 Article.fetchAll().then(cb) ,其中的 cb 是回调(callback)的缩写.

上例子中选择了 SQLite数据库,还有热门的 sqlite3 模块。SQLite 是进程内数据库,
所以很方便:你不需要在系统上安装一个后台运行的数据库。你添加的所有数据都会写到一个文件里,也就是说程序停掉后再起来时数据还在,所以非常适合入门学习时用。

制作自己的模型 API

文章应该能被创建、获取、删除,所以模型 Articles 应该提供一下的方法:

  • Article.all(cb):返回文章
  • Article.find(id,cd):给定ID,找到对应的文章
  • Article.create({title,content},cb):创建一篇有标题和内容的文章
  • Article.delete(id,cb):根据ID删除文章

这些都可以用sqlite3模块实现。有了这个模块,我们可以用 db.all 获取多行数据,用db.get获取一行数据。不过先要有数据库连接。

安装 sqlite3:

1
npm i -S sqlite3

接着在 ds.js 中实现代码完成上述功能。

1
2
3
4
5
6
7
8
9
10
11
12
13
14
15
16
17
18
19
20
21
22
23
24
25
26
27
28
29
30
31
32
33
34
35
36
const sqlite3 = require('sqlite3');
const dbName = 'later.sqlite';
// 新建并连接到数据库文件
const db = new sqlite3.Database(dbName);

db.serialize(() => {
// 如果还没有,创建一个 articles 表
const sql = `
CREATE TABLE IF NOT EXISTS articles (id integer primary key, title, content TEXT)
`;
db.run(sql);
});

// 定义模型类 Article
class Article {
// 获取所有文章
static all(cb) {
db.all('SELECT * FROM articles', cb);
}
// 选择一篇指定的文章
static find(id, cb) {
db.find('SELECT * FROM articles WHERE id = ?', id, cb);
}
static create(data, cb) {
// 问号表示参数
const sql = `INSERT INTO articles(title, content) VALUES (?, ?)`;
db.run(sql, data, tile, data.contont, cb);
}
static delete(id, cb) {
if (!id) return cb(new Error('please provide an id'));
db.run('DELETE FROM articles WHERE id = ?', id, cb);
}
}

module.exports = db;
module.exports.Article = Article;

上面例子中创建了一个 名为 Article 的对象,它可以用标准的 SQL 和 sqlite3 创建、获取和删除数据。首先用 sqlite3.Database 打开一个数据库文件,然后创建表的 articles 。这里用到了 SQL 语法 IF NOT EXISTS ,以防一不小心重新运行了代码删除了前面的表重新创建一个。

数据库和表准备好了之后,就可以进行查询。用 sqlite3 的 all 方法可以获取的所有文章。用带问号的查询语法提供具体值的方法可以获取指定文章,sqlite3 会把 ID 插入到查询语句中,最后用 run 方法插入和删除数据。

基本的数据库功能已经实现了,接着我们把它添加到 HTTP 路由中。下面这段代码添加了所有方法,除了 POST 。(因为需要用到 readability模块,但你还没有装好,所以要单独处理。)

1
2
3
4
5
6
7
8
9
10
11
12
13
14
15
16
17
18
19
20
21
22
23
24
25
26
27
28
29
30
31
32
33
34
35
36
37
38
39
40
41
42
43
44
45
46
47
48
49
50
const express = require('express');
// express() 创建一个程序实例
const app = express();
// 消息解析器
const bodyParser = require('body-parser');
// 加载数据库模块 Article 类
const Article = require('./db').Article;
app.use(bodyParser);
// 支持编码为 JSON 的消息请求体
app.use(bodyParser.json());
// 支持编码为表单的请求消息体
app.use(bodyParser.urlencoded({ extended: true }));
// 数组定义 文章articles
const articles = [{ title: 'Example' }];
const port = process.env.PORT || 3000;
// 添加路由处理器
app.get('/', (req, res) => {
res.send('Hello World');
});
// 获取所有文章
app.get('/articles', (req, res, next) => {
Article.all((err, articles) => {
if (err) return err;
res.send(articles);
});
});
// 获取指定文章
app.get('/articles/:id', (req, res, next) => {
const id = req.params.id;
Article.find(id, (err, article) => {
if (err) return next(err);
res.send(article);
});
});
// 删除指定文章
app.delete('/articles/:id', (req, res, next) => {
const id = req.params.id;
Article.delete(id, (err) => {
if (err) return next(err);
res.send({ message: 'Deleted' });
});
});


// 程序实例绑定到一个 TCP端口
app.listen(port, () => {
console.log(`Express web app available at localhost: ${port}`);
});

module.exports = app;

db.js 文件放在同个目录,Node 会加载那个模块,然后用它获取所有文章,查找特定文章和删除一篇文章。

最后一件事情是实现创建文章的功能。还要用 readability 算法处理它们。

让文章可读并存起来

RSETful API 已经搭建好了,数据也可以持续化到数据库中,接下来该写代码把网页转换成简化版的 “阅读视图”。不过我们不用自己实现, npm 中有这样的模块。

在 npm上搜索 readability 会找到很多模块。我们试一下 node-readability:

1
npm i node-readability -S

这个模块提供了一个异步函数,可以下载指定 URL 页面并将 HTML 转换成简版。

1
2
3
4
5
const read = require('node-readability');
const url = 'http://www.manning.com/cantelon2/';
read(url,(err,result)=>{
// 结果有.title 和 content
})

还可以和数据库类结合起来,用 Article.create 方法保存文章:

1
2
3
4
5
read(url,(err,result)=>{
Article.create({title:result:title,content: result.content},(err,article) =>{
// 将文章保存到数据中
});
});

打开 index.js 添加新的 app.post 路由处理器,用上面的方法方法实现下载和保存文章的功能。

1
2
3
4
5
6
7
8
9
10
11
12
13
14
15
const read = require('node-readability');
// 创建一篇文章
app.post('/articles', (req, res, next) => {
// 从 POST 消息体重得到 URL
const url = req.body.url;
read(url, (err, result) => {
// 用 readabiliry 模块获取这个 URL 指向的页面
if (err || !result) res.status(500).send('Error downloading article');
Article.create({ title: result.title, content: result.content }, (err, article) => {
if (err) return err;
// 文章保存成功后发送提示
res.send('OK');
});
});
});

上面代码中,先从 POST 消息体中得到 URL ,然后用 node-readability 模块获取这个URL 指向的页面,用模型类 Article 保存文章,如果有错误,将处理权交给 express 的中间件栈;否则,将 JSON 格式的文章发送给客户端。

添加用户界面

给 Express 项目添加界面需要做的几件事情,首先是使用模块引擎。

支持多种格式

基本做法是用 Express 的 res.format 方法,它可以根据请求发送响应格式的响应。它的用法如下,提供一个包含格式已经对应的响应函数的列表:

1
2
3
4
5
6
7
8
res.format({
html:()=>{
res.render('articles.ejs',{ articles: articles});
},
json:()=>{
res.send(articles);
}
});

这段代码中, res.render 会渲染 view 文件夹下的 articles.ejs。但这需要安装模板引擎并创建相应的模板。

渲染引擎

模板引擎有很多,EJS属于简单易学的那种。安装:

1
npm i ejs -S

res.render 可以渲染 EJS 格式 的 HTML 文件。在 view 文件夹中创建 articles.ejs

1
2
3
4
5
6
7
8
9
10
11
<% include head %>
<ul>
<% articles.forEach(article =>{ %>
<li>
<a href="/articles/<%= article.id %>">
<%= article.title %>
</a>
</li>
<% }) %>
</ul>
<% include foot%>

页眉和页脚模块

1
2
3
4
5
6
7
8
9
10
11
 <!-- 页眉 -->
<html>
<head>
<title></title>
</head>
<body>
<div class="container">
<!-- 页脚 -->
</div>
</body>
</html>

用npm管理客户端依赖项

模块搞定之后,就是样式了。安装 bootstrap

1
npm install bootstrap --save

然后在 node_modules/boostrap 里面会看到源码,在 dist/css 里面有css文件,要让服务器响应静态文件请求才可以使用这些文件。

Express 自带了 一个名为 express.static 中间件,可以给浏览器发送客户端 JavaScript、图片和CSS 文件。只要将它指向包含这些文件的目录,浏览器就可以访问到这些文件了。

1
2
// 加载 css文件
app.use('/css/bootstrap.css',express.static('node_modules/bootstrap/dist/css/bootstrap.css'));

接着在头模块中引入

1
<link rel="stylesheet" href="/css/bootstrap.css">

这只是 Bootstrap的 CSS。它还有很多文件,包括图标、字体以及 jQuery插件。你可以往项目里添加更多文件,或者用工具把它们打包成一个文件,让浏览器更容易加载。

总结

  • 用 npm init 和 Express 可以快速搭建出一个 Node Web 应用程序
  • npm install 是安装依赖项的命令
  • 可以用 Express 制作带有 RESTful API 的 Web 程序
  • 选择适合的数据库系统和数据库模板根据个人需求
  • 对于小项目来说,SQLite 很好用
  • 在 Express 中用EJS渲染模板很容易
  • Express 支持很多模块引擎,包括Pug和Mustache
0%